Plumbers will tell you every pipe leak needs a pro. DIY forums will tell you every pipe leak can be fixed with epoxy and enough YouTube videos. Neither is true. The honest answer is that some pipe leaks are genuinely homeowner-fixable, others are technically fixable but will cost you more in the long run, and a specific category absolutely requires a licensed plumber regardless of how confident you are with tools.
This article lays out exactly which pipe leaks you can safely tackle yourself in a Goose Creek home, which ones you should not touch, and the gray-zone scenarios where DIY works as a temporary fix but not a permanent one. No gatekeeping, no fear-mongering, just the actual truth based on 30 years of seeing what works and what ends up costing homeowners thousands.
The DIY Pipe Leak Decision Matrix
Before you grab a wrench or call a plumber, use this matrix to figure out which category your specific leak falls into.
| Leak Scenario | DIY Verdict | Why |
| Small drip at shutoff valve under sink | DIY OK | Usually just needs tightening or washer replacement |
| Loose compression fitting on exposed pipe | DIY OK | Simple wrench adjustment, accessible location |
| Pinhole leak in exposed copper pipe | DIY with caveats | Temporary fix only, call pro within 30 days |
| Leak at threaded joint (exposed) | DIY OK | Teflon tape or pipe dope reapplication fixes most |
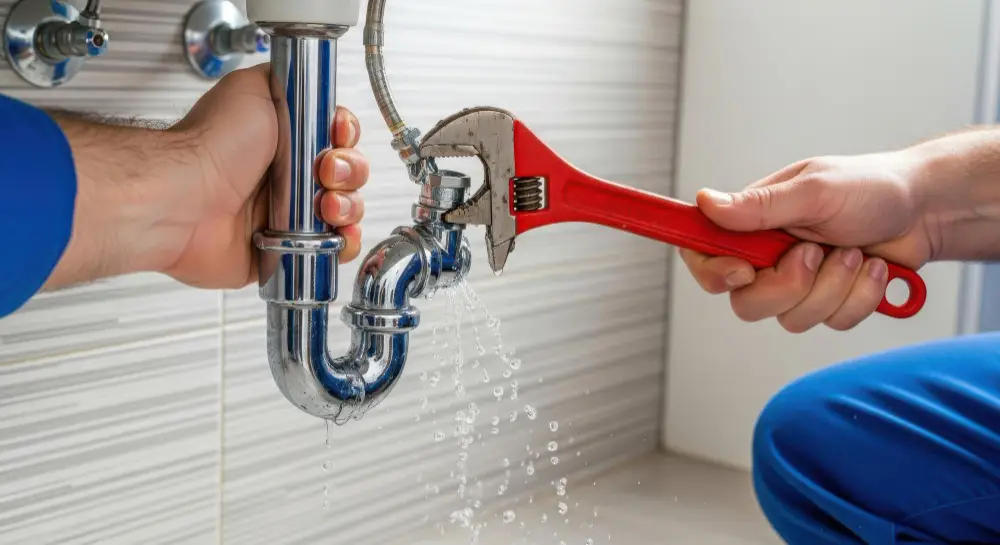
| Leaking P-trap under sink | DIY OK | Tightening slip nuts or replacing washers |
| Loose supply line on toilet or sink | DIY OK | Swap out the braided line, 5-minute fix |
| Leak inside any finished wall | Call a pro | Diagnosis and repair both require specialized skills |
| Slab leak (foundation pipe) | Call a pro | Requires specialized detection and slab work |
| Multiple pinhole leaks in same line | Call a pro | Pipe is failing systemically, needs section replacement |
| Any leak involving gas or main water line | Call a pro | Legal, code, and safety reasons |
| Leak in galvanized steel pipe | Call a pro | Entire section needs replacement, not a patch |
| Hot water line leak at water heater | Call a pro (usually) | Pressure, heat, and warranty implications |
The pattern is clear. Exposed, accessible leaks at fittings or joints are usually DIY territory. Anything behind walls, under slabs, or involving failing pipe material needs a pro. The gray zone is small pinhole leaks in exposed pipe, where DIY can buy you time but should not be treated as a permanent fix.
When DIY Pipe Leak Repair Actually Works
There is a specific set of conditions where DIY pipe leak repair is genuinely the right call. If your leak meets all four of these criteria, you can probably handle it yourself.
- The pipe is fully exposed and accessible without cutting into walls, floors, or ceilings
- The leak is at a connection point (coupling, compression fitting, threaded joint, supply line) rather than in the pipe body itself
- The pipe material is copper or PEX (galvanized and polybutylene repairs rarely work long-term)
- You can fully close the water supply to that specific section while you work
Most Goose Creek homes have at least a few leaks that fall into this category over the years. A loose braided supply line under a sink, a dripping shutoff valve, a slow weep at a P-trap, a compression fitting that loosened over time. These are all legitimate DIY repairs that take under an hour with basic tools.
What Works for DIY Pipe Leak Fixes (And What Does Not)
Here are the DIY fixes that actually work when applied correctly, ranked by reliability.
Tightening a compression fitting or slip nut. This is the simplest and most effective DIY repair. If a connection is weeping slightly, a quarter-turn with a wrench often solves it. Just remember, over-tightening will crack the fitting and create a bigger leak. Hand-tight plus a quarter turn is the rule.
Replacing a washer or O-ring. Most fittings have a rubber washer that compresses to create the seal. Washers harden and crack over time. Swapping in a new one is a $2 fix that solves most fitting leaks permanently.
Reapplying thread sealant or Teflon tape on threaded joints. If a threaded connection is leaking, disassembling the joint, cleaning the threads, and reapplying PTFE tape or pipe dope almost always fixes it. Wrap in the direction the fitting will turn when tightening, usually clockwise.
Push-fit fittings (SharkBite style) on copper or PEX. These are an acceptable DIY option for replacing a short section of failed pipe. They are not as pretty as soldered connections, but they hold pressure reliably for years. They are particularly useful when you do not have soldering skills.
Pipe clamps with rubber sleeve. For a temporary fix on a pinhole leak, a pipe clamp sleeve can stop the leak for weeks or months. This is not a permanent fix. The underlying pipe issue will eventually show up again, usually worse.
What does not reliably work for DIY: epoxy putty on pressurized pipes, rubber tape on copper, silicone around threaded joints, hose clamps without proper sleeves. These approaches fail more often than they succeed, and the failure is usually worse than the original leak.
The Temporary Fix vs Permanent Fix Distinction
This is where most DIY pipe leak advice goes wrong. There is a meaningful difference between stopping a leak temporarily and actually fixing the underlying problem. Confusing the two is how homeowners end up with water damage months after their “DIY fix” worked at first.
Temporary fixes include pipe clamps, epoxy putty, rubber tape, hose clamps, and pipe wrap. These can stop an active leak in minutes, which is exactly what you need when water is spraying out of a pipe at 10pm. But the underlying issue (pipe corrosion, fitting failure, freeze damage, age) is still there, and it will reappear. A temporary fix buys you time to call a plumber during business hours instead of paying emergency rates.
Permanent fixes replace or properly restore the failed component. Swapping out a corroded supply line, replacing a cracked fitting, cutting out a bad section of pipe and splicing in new material. These are fixes that last for years and actually solve the problem.
Homeowners get into trouble when they treat a temporary fix as permanent. The pipe clamp that is still holding after 6 months is not a success story, it is a failure waiting to happen. If you use a temporary fix to stop an active leak, document it and schedule a proper repair within 30 days. For context on what a professional repair actually costs, our guide to pipe leak repair cost in Goose Creek breaks down real 2026 pricing by repair type.
When DIY Pipe Leak Repair Gets Expensive
DIY pipe repairs fail in predictable ways, and the failure mode usually costs far more than the original professional repair would have. Here are the scenarios where DIY regularly becomes a money pit for Goose Creek homeowners.
Hidden leaks behind the DIY fix. A homeowner patches a visible pinhole leak with epoxy. The fix holds the visible leak but the underlying pipe has multiple failures along its length. The leak just moves to the next weak spot, which might be inside a wall where it causes damage for weeks before anyone notices. The original $300 professional section replacement becomes a $4,000 water damage job.
Over-tightening that cracks fittings. The most common DIY failure we get called back to fix. A homeowner tightens a compression fitting too hard, cracks the brass, and creates a leak that is worse than what they started with. Sometimes the cracked fitting does not leak immediately but fails a week later when the pressure equalizes.
Wrong materials for Goose Creek water. Our water is hard and slightly corrosive to certain metals. A DIY repair using mismatched metals (galvanized to copper without a dielectric union, for example) will corrode rapidly and fail within a year or two. A plumber who knows the local water conditions uses the right materials from the start.
Warranty and insurance implications. If your pipe repair fails and causes water damage, your insurance may deny the claim if they can prove the damage resulted from amateur repair work. This is rare but it happens, and the denial is always worse than just paying for a proper repair upfront.
The Gray Zone: Pinhole Leaks in Exposed Pipes
Pinhole leaks in exposed copper pipes deserve their own discussion because they are the single most common leak type where DIY is tempting but risky. A tiny pinhole drip in a visible basement or crawl space pipe looks like the perfect DIY job. It often is, temporarily, but the reasoning behind the pinhole matters enormously.
Pinhole leaks in copper pipes usually indicate one of two things. Either the pipe has been physically damaged at that spot (nail strike, abrasion, settling stress) which is isolated, or the pipe has developed pitting corrosion from water chemistry which is systemic. The first is genuinely DIY-fixable. The second means the entire line is going to start leaking at multiple spots over the next few years.
You usually cannot tell the difference without cutting out the failed section and examining the pipe wall from the inside. A plumber who sees the cut piece can tell you in 30 seconds whether it is isolated damage or systemic corrosion. A DIY fix with epoxy or a pipe clamp does not give you that diagnostic information, which is why the same homeowner often calls back 6 months later with a new leak 2 feet away.
The Non-Negotiable Never-DIY Scenarios
Some pipe leaks are never appropriate for DIY regardless of confidence level. These are the scenarios where we strongly recommend calling a licensed plumber from the start.
- Any gas line leak (safety and legal issue, DIY is often illegal)
- Any main water line leak before the meter (often municipal responsibility, DIY can void coverage)
- Slab leaks or any pipe under a concrete foundation
- Pipes inside finished walls or ceilings (diagnosis requires specialized tools)
- Hot water lines at the water heater (pressure, heat, warranty implications)
- Sewer lines or any waste pipe (contamination, code, permit issues)
- Multiple simultaneous leaks suggesting systemic pipe failure
When You Need Professional Pipe Leak Help
If your leak falls into the pro-only category, or if you tried a DIY fix that did not hold, Mueller’s Plumbing Service handles pipe leak diagnosis and repair across Goose Creek and the Tri-County area. We tell you honestly whether a DIY attempt might have worked or not, diagnose the underlying issue (isolated damage vs systemic failure), and give you written pricing for the actual fix before any work starts.
Call us at (843) 572-8522 for leak diagnosis and repair, or visit our pipe leak repair service page to see our full scope of work. After 30 years of fixing both the original leaks and the DIY attempts that did not hold, we know exactly when DIY makes sense and when calling us saves you thousands.